Showing posts with label ReStore. Show all posts

Friday, January 2, 2015

Thift Store Chair Makeover


Happy New Year Friends!

I apologize for my complete lack of posting anything in the past several months. Life got away from me and my creative juices nearly shut down. While I have completed a few small crafty projects, I haven't had the time (or energy) to work on anything big until recently. I was lucky to have two weeks off of work for the holidays and I spent some quality time with pinterest to spark my creativity.

I came across a few posts on fabric painting with chalk paint, which piqued my interest because I have extra chalk paint and I have been fawning over gorgeous wingback chairs for a while now. My library room is the first room you see as you enter my home and it is lacking seating. While visiting my favorite thifty store, the Habitat for Humanity Restore, I found a wingback chair in great condition with one exception - the fabric. The chair price was lowered to $35! Score!

Wingback in need of a face lift
I pulled out the chalk paint from the garage and blew off the dust. It has been too long since I have played with chalk paint. The colors I used are Old Ochre and Old White.


Before painting, make sure to clean the chair of any stains or dirt. I gave my chair a good vacuum and cleaned any dirt spots.

I did a lot of research online before starting this project. I learned that one must add water to the chalk paint in order to thin it out and ensure the paint will soak into the fabric. So I added enough water to make the paint look the consistency of milk. Then I used a spray bottle of water to wet the fabric directly. I used that spray bottle a lot on the first coat to smooth out the paint.

Use a spray bottle to wet the fabric

Starting the first coat.

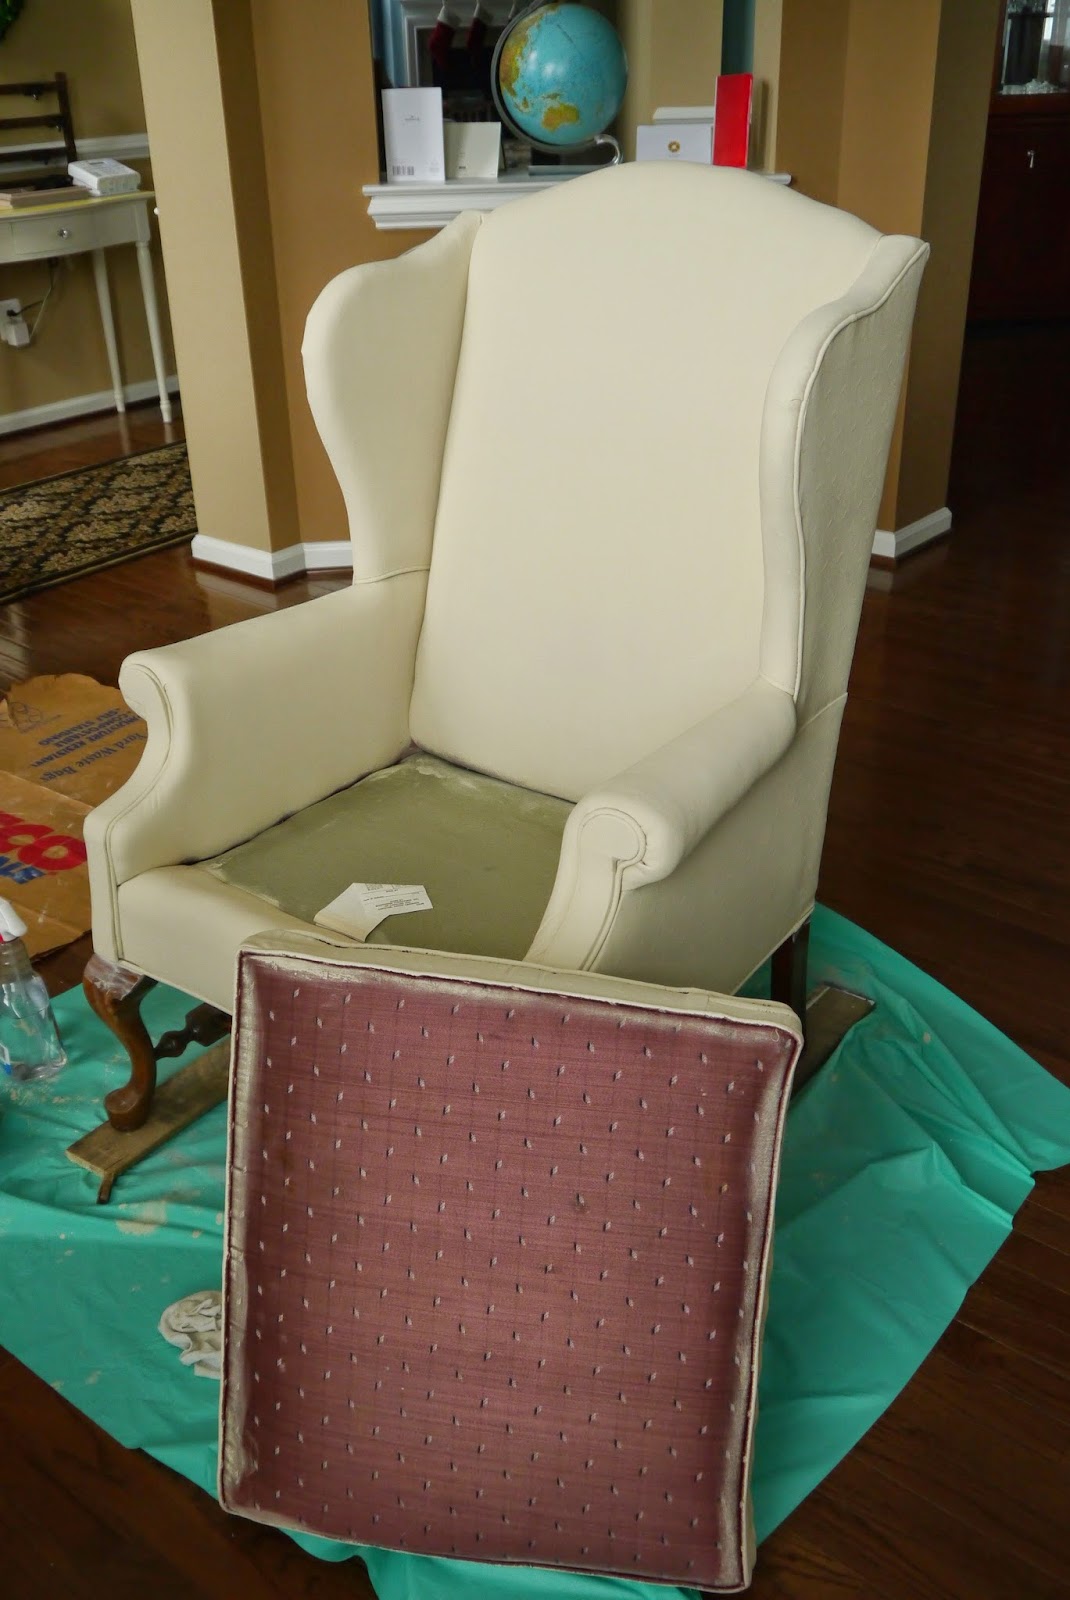
I left the bottom of the cushion unpainted to show my progress. The first coat was very streaky and took a while to dry because I used a lot of water. I let the chair dry overnight before attempting the second coat.
First coat completed!

I still diluted the paint on the second coat to a milk consistency. However, I did not use the spray bottle as much on the fabric because of the first coat of paint.


Starting the second coat


 The second coat of paint covered a lot better but still had some streaks.

Second coat complete!

 The final coat of paint! I was surprised at how "soft" the chair looked. The coverage was great too!
Final coat of paint

I used the Old White chalk paint to color the trim. So fancy!

Added Old White to the trim

Be sure to apply a thin coat of clear wax, which both seals the paint and softens the fabric. At this point the chair fabric has the suppleness of outdoor fabric. I also applied non-diluted Old White chalk paint to the chair legs/frame.

I may go back and distress the chair legs/frame at some point. However, I am happy with the look for now. I am curious how long the painted fabric will handle the daily use. So far so good!

Take Care!

Friday, June 6, 2014

Vintage Metal Chair Makeover


I've been on the look out for seating options that I could use in our new screened-in-porch.  I mentioned the Habitat for Humanity Restore before.  I may have a small obsession because I peruse through the Restore on a nearly weekly basis at this point.  You never know what you will find and when the price is right, one can find some great deals.

For example, I picked up a pair of vintage metal fold-able chairs for $15.  These late 1950's vintage gold tone metal folding chairs are sturdy and still have plenty of life left in them.

1950's Vintage Chair

One advantage to older constructed chairs is their simplicity.  The vintage chairs are really simple to take apart.  I gave them a good scrub including the vinyl seat material, which are still in decent condition.


Because I planned to use these chairs outdoors, I coated them with UV-Resistant, non-yellowing Rustoleum.


I gave the frames two coats of Rustoleum and also coated that chain linked table you see in the background.  I found that little chain table on sale at Home Goods.


I switched out the seat cushion batting with a polyester batting which is mildew resistant.  I found the polyester outdoor fabric on sale at Joann's online. 


I decided to keep the original vinyl material as an extra layer of water resistance.  I added the outdoor fabric over top.


Here is the final product.  The pair of chairs is a small but good start to my future seating and dining areas on our new porch.

Pair of 1950's Vintage Chairs

Daphne likes the chairs too


Wednesday, April 2, 2014

Spring has sprung!

I am finally coming out of hibernation!  We have had a tough, cold winter that has kept me inside and suppressed my creativity.  The weather is finally starting to shift into spring and I can tolerate working in the garage - although, I should clean the garage out at some point.

Anyway, this past weekend I finished two small projects.  I have a few pairs of old wooden shutters lying around in the garage.  For months I've had an idea in my head to use the shutter as a mail organizer/command center sort of thing.

Old wooden shutter from a Habitat Restore for $5
I used left over Chateau Grey chalk paint, which is a muted green/grey color.  After a small amount of distressing, I added a coat of clear soft wax.


I added a few hooks to hang extra keys and used wooden mini chalk board clothes pin labels.  This organizer is a great way to keep cards, bills and coupons off the counter.  I did a quick search on etsy for a shutter mail organizer and they sell for $30 and up.  I spent $5 for the pair of shutters, which means I still have one side left. I used left over paint and wax. I purchased the silver hooks for ~$1.70 at the hardware store.  I hung the organizer with Command removable picture hanging strips so I could remove the shutter without damaging the cabinet.

Finished shutter mail organizer

In addition to the shutter project, I updated my small wall gallery with nautical themed canvas.  I am sort of obsessed with nautical themed everything right now... anchors, rope, blue/white strips, etc. 


I used mod podge to adhere the images to blank canvases. Then added a black paint border with a sponge.  I've done this before and it is a fun, easy project.


For those keeping score, I made the currency collage a few years ago as a way to display all the currency I've collected while traveling.  I also created the subway art image used in the top right display which includes all of the places my husband and I have traveled together.

That's all for now!  I hope spring is here to stay.

Sunday, December 1, 2013

Weekend Finds

Are you familiar with Habitat for Humanity?  Over the weekend I found a Habitat for Humanity (HFH) ReStore location near by.  I have never been in a ReStore before but thought why not?  The HFH ReStore resells building materials, home improvement products and general household goods.  The ReStore in my area was bigger than I expected - it was more of a warehouse.  Sorry I did not take any photo's of the store.  Below are the items that came home with me:

Finds at local ReStore
Set of wooden shutters, 3 mini twig wreaths, a world globe and a wooden chair.  The grand total of my purchase was $16.70.  Can't beat that!

The mini wreaths are added to my stash of craft goodies.  I do not have a plan for them yet but at .25 cents, I could not pass them up.

This is my second set of wooden shutters.  I will likely paint them white and distress them.  One of the sets of shutters I have will become a note collecting station - I suspect the other set will be a decor item.

I have been looking for a globe for a while now.  This one has a really pretty color.  I cleaned it up and made some minor repairs.  She is sitting on a half wall between my dining room and library because her color goes well with the dining room.

The wooden chair was a steal at $5.  The paint is already worn and chipped.  The color is within the color family of my craft room desk.


I took some sand paper to the chair and smoothed out the paint chips.  I found a light greenish paint color peeking through.


The extra distressing added a lot of character and interest to the chair.  I wish I knew more about the life of this little chair.

Take Care!