Sunday, December 15, 2013

May Christmas Happen in Your Heart or with spray paint

This post will be a hodgepodge of holiday decor and small DIY/craft projects.  Lets begin with the crafty stuff.  Do you remember the 3 mini twig wreaths I mentioned in the Habitat for Humanity post?  I also picked up a small ceramic googly-eyed owl at the thrift store for $3.

Wreaths and Owl ready to paint

googly-eyed owl
I spray painted everything with white paint.  I wanted the owl to fit in with my milk glass collection so it could live on the same bookcase.

White flat spray paint
White Owl
This is how the little owl turned out.  He is cute.  I sat him in a festive old Yankee candle holder stand thing that I've had for years. 

Holiday 3 Wreath Trio
I turned the newly white twig wreaths into a small holiday decoration for our guest room.  It is hard to see because of the bright light, each wreath is hot glued to one long piece of ribbon with a bow at the top.  Then I added a blue ball ornament to each.  What I like about this little decor piece is that after Christmas, I can remove the ornaments and the wreath trio will still fit in.

Lets move onto holiday decor.  I probably do not have enough to do one of those fancy house tour blog posts, but I will share a few of my favorite things (that is a song, right?) beyond the traditional tree, stockings and mantel.


This globe also came from Habitat for Humanity.  I added a Peace On Earth vinyl decal.  The decal spans a good half of the globe, but it works because as you walk past the globe, you read the whole phrase.  I heart this $5 globe.  I may keep her out year round.


I went a little silver happy for the dining room tablescape.  The silver theme will translate well into New Years.


I saw this idea on another decor blog.  I used a satin gift ribbon to wrap this pillow to mimic a gift.  The ribbon instantly added a bit of holiday spirit.  I love it.

I love preserved boxwood wreaths and this one is my first.  I can not claim it as a DIY because I purchased the wreath online while it was on sale.  I'd love to make one myself, but my boxwood bushes are still in their infancy stage.  To add a some holiday sparkle, I stuck a little reindeer ornament in the center.

I hope you have a wonderful holiday season.  Best wishes for a happy and healthy New Year!

Take Care!

Sunday, December 1, 2013

Weekend Finds

Are you familiar with Habitat for Humanity?  Over the weekend I found a Habitat for Humanity (HFH) ReStore location near by.  I have never been in a ReStore before but thought why not?  The HFH ReStore resells building materials, home improvement products and general household goods.  The ReStore in my area was bigger than I expected - it was more of a warehouse.  Sorry I did not take any photo's of the store.  Below are the items that came home with me:

Finds at local ReStore
Set of wooden shutters, 3 mini twig wreaths, a world globe and a wooden chair.  The grand total of my purchase was $16.70.  Can't beat that!

The mini wreaths are added to my stash of craft goodies.  I do not have a plan for them yet but at .25 cents, I could not pass them up.

This is my second set of wooden shutters.  I will likely paint them white and distress them.  One of the sets of shutters I have will become a note collecting station - I suspect the other set will be a decor item.

I have been looking for a globe for a while now.  This one has a really pretty color.  I cleaned it up and made some minor repairs.  She is sitting on a half wall between my dining room and library because her color goes well with the dining room.

The wooden chair was a steal at $5.  The paint is already worn and chipped.  The color is within the color family of my craft room desk.


I took some sand paper to the chair and smoothed out the paint chips.  I found a light greenish paint color peeking through.


The extra distressing added a lot of character and interest to the chair.  I wish I knew more about the life of this little chair.

Take Care!

Sunday, November 24, 2013

Medicine Cabinet Farewell

I spend too much time searching other DIY blogs.  I came across a couple tutorials on transforming a bathroom medicine cabinet into open shelving.

girl meets home
One House One Couple

Then I came home and stared at my small, confined guest bathroom.  The plastic, builder grade medicine cabinet jetted out from the wall and cast an ugly shadow.  While the guest bathroom is a full bathroom with tub/shower, 95% of the year it serves a powder room function.  My point is the medicine cabinet is very rarely used.


I wanted to find ways to make the small bathroom feel open and look aesthetically pleasing (pretty?).  After finding the above blog posts, I took a screw driver to the four screws securing the plastic, builder grade medicine cabinet to reveal, literally, a hole in the wall.


And then I found a problem. Why is there a wire behind the medicine cabinet?!?  I don't play with wires. I called an electrician/handyman and had that wire moved, which turned out to be an easy change to make.

Although, that did mean a small hole was cut in the drywall to move the wire  : /


I got my hands dirty on this project and went outside of my DIY comfort zone. I cut all the drywall, filled the hole with a backing board, used drywall tape, joint compound and made miter cuts for the trim. I won't lie, I made a LOT of mistakes, which means I learned a lot : )


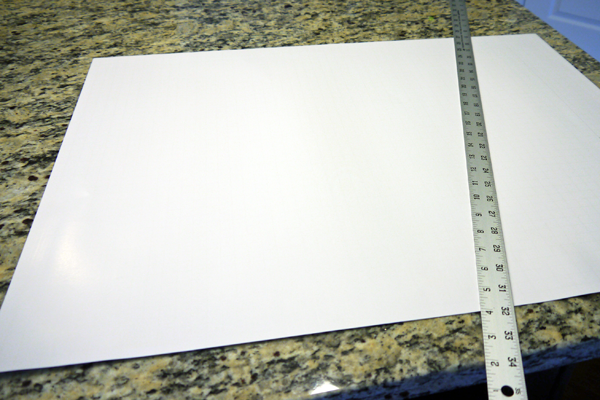
I wanted the light to pass through the shelf so I spent the $ to order a custom cut piece of glass.  It fits perfect and has a smooth, beveled edge.


In addition, we changed out the mirror for a oval, framed mirror and added a basket above the toilet.  The photo's don't do the bathroom justice (no natural light means not the best photos). I think the new inset shelf helps achieve the open feel I am looking for and allows for small decor items to make the bathroom feel cozy.

That's all for this weekend.

Take Care!

Friday, November 22, 2013

Open Shelves: Yes or No?

This past week I came up with the bright idea to remove a couple of my kitchen cabinet doors for open shelving.  As you can see, my kitchen cabinets are very dark. 


Dark Kitchen Cabinets

I was seeking a way to brighten up the dark cabinets but did not want to make any permanent changes such as paint.

Bye Bye Cabinet Doors
On a whim, I removed two cabinet doors near the sink.  It was easier than I thought - just 3 screws per door.  I styled the cabinets with white and glass dishes/cups.  The white dish set is our daily use dishes so they are now easily accessible.

But removing the doors was not enough. I wanted the open shelves to look like they were meant to be that way.  There are many tutorials online about painting the inside of your cabinets turned open shelves or making fancy foam board backing.  My cabinets have adjustable shelves so I came up with a game plan to remove all the shelves and put a piece of thin poster board covered in fabric behind the shelves for color.  It would be thin enough to fit behind the shelves and at the same time, the shelves would help keep the poster board in place.

Measure and cut poster board to size
I used removable spray adhesive and removable glue dots to stick the fabric to the poster board.  That way I can change out the fabric at any time.  I added a few more removable glue dots onto the back of the poster board and pushed it into the back of the cabinet, replaced the shelves, and put the dishes back in.

Fabric is called Apples & Pears

Kitchen cabinet turned open shelving


How fun is that kitchen inspired apple and pear fabric?  This quick change was super easy, inexpensive and not permanent.

Only problem is, my husband is not digging the open shelf concept.  I like it.  What do you think? Open Shelves: Yes or No?

Tuesday, November 19, 2013

Treasure Hunting in Falls Church

Alisa and I checked out the treasure hunting scene in Falls Church over the weekend.  We both were interested in visiting the Stylish Patina Rough Luxe Marketplace and the retail store.  In addition, Alisa discovered a shop hop of a few other stores we were interested in.  Neither of us came home with lots of treasures but I found a few small gems.


A mini preserved boxwood topiary, old blue book and silver mercury glass style candle holder.  Both the topiary and blue book found a home on my pallet display.  I swear I change up that pallet display every single week!  I plan to use the silver candle holder in my main level bathroom open shelving when that project is finished (photo's of that project to follow one of these days).


A vintage soldered metal and glass covered box which I am using to store jewelry at the moment.  I think the box would be neat to store cotton balls in the bathroom too.

I did have to make an enhancement (fix?) to the soldered metal and glass box.

Missing leg


I found little wooden beads at the craft store that fit perfectly into the missing leg socket.  I sanded down the bead to make the dish level. Then I used construction adhesive (think liquid nails) to glue the wooden bead into the metal socket.


I painted all five legs with a primer before adding craft paint.  I decided to paint all the legs so they would look consistent.


I used craft paint in the color gun metal to paint all the legs.  She is as good as new!  At least, she is balanced on all legs now.

I am excited about the open shelving project in my guest bathroom.  I hope to finish it up this week so I can share photos.

Take Care!

Monday, November 11, 2013

Estate Sales

Inspired by friend and fellow blogger, Alisa with Five Eleven Decor, I checked out a couple estate sales over the weekend.  A while back Alisa posted on her blog all her favorite places to treasure hunt (although, I can't seem to find that post at the moment), and that is where I discovered http://www.estatesales.net/.  I've been searching my area for sales and found two near by.  Below are the items I picked up:


Vintage Tin Box
Skeleton Keys

My eyes were drawn to this old tin container and as I picked it up, I realized something was in it.  It was a nice surprise to find a bunch of old skeleton keys inside.

Vintage Iron
My grandmother has been looking for an vintage iron to use as a door stop.  She will get this one tied with a bow for Christmas.  Don't worry I did not spoil the surprise, she already knows about it.

Pillow
I found a pair of small pillows with an neat design.  One pillow is on this red chair and its twin is across the room on the sofa.

Blue and White Decorative Pillow Shames
I've been wanting to change up the bedding in the guest room.  It was a bit too matchy, matchy if you know what I mean.  I found these two decorative flannel pillow shames at my favorite local consignment shop Carriage House Consignment. They are well within the pattern theme of the bedding but the darker pattern add a little contrast and they are super soft.

Previous Bedding
This shows the pillow shams that came with the bedding set and the matchyness (is that a word?) that I am referring to.


Hobnail Milk Glass
Hobnail Milk Glass
Vase With Clear Ruffled Edges

The milk glass collection is spreading to the mantel
I picked up the milk glass the consignment shop.  Carriage House has quite a bit of milk glass available but I am picky and search out the items at the cheapest prices.  My favorite type of milk glass are the pieces with the clear edges.  I put a few of the skeleton keys from the estate sale in the little round hobnail milk glass and two sparkly Christmas balls in the oblong hobnail milk glass dish.

And yes, I did break out the Christmas decorations.  I use the month of November as a transition month.  You will find both pumpkins and Christmas balls in my house right now.  Maybe it was the Christmas shopping over the weekend that put me in the holiday mood.

Have you started Christmas shopping?

Take Care!